Create a unit session
So you have created unit templates, and now you want to turn them into actual, live sessions.
Before diving into the details, let’s see the two steps involved in creating a session:
- Choose the unit template you want to turn into a session
- Configure the session
- Say to which campus / cursus the session belongs to
- Configure each project inside the session (when it runs, if it’s done in groups, when reviews should happen…)
All those are done in a fixed order.
(Don’t worry, the interface gently leads you from one to the next.)
Now, let’s see what it actually looks like in practice.
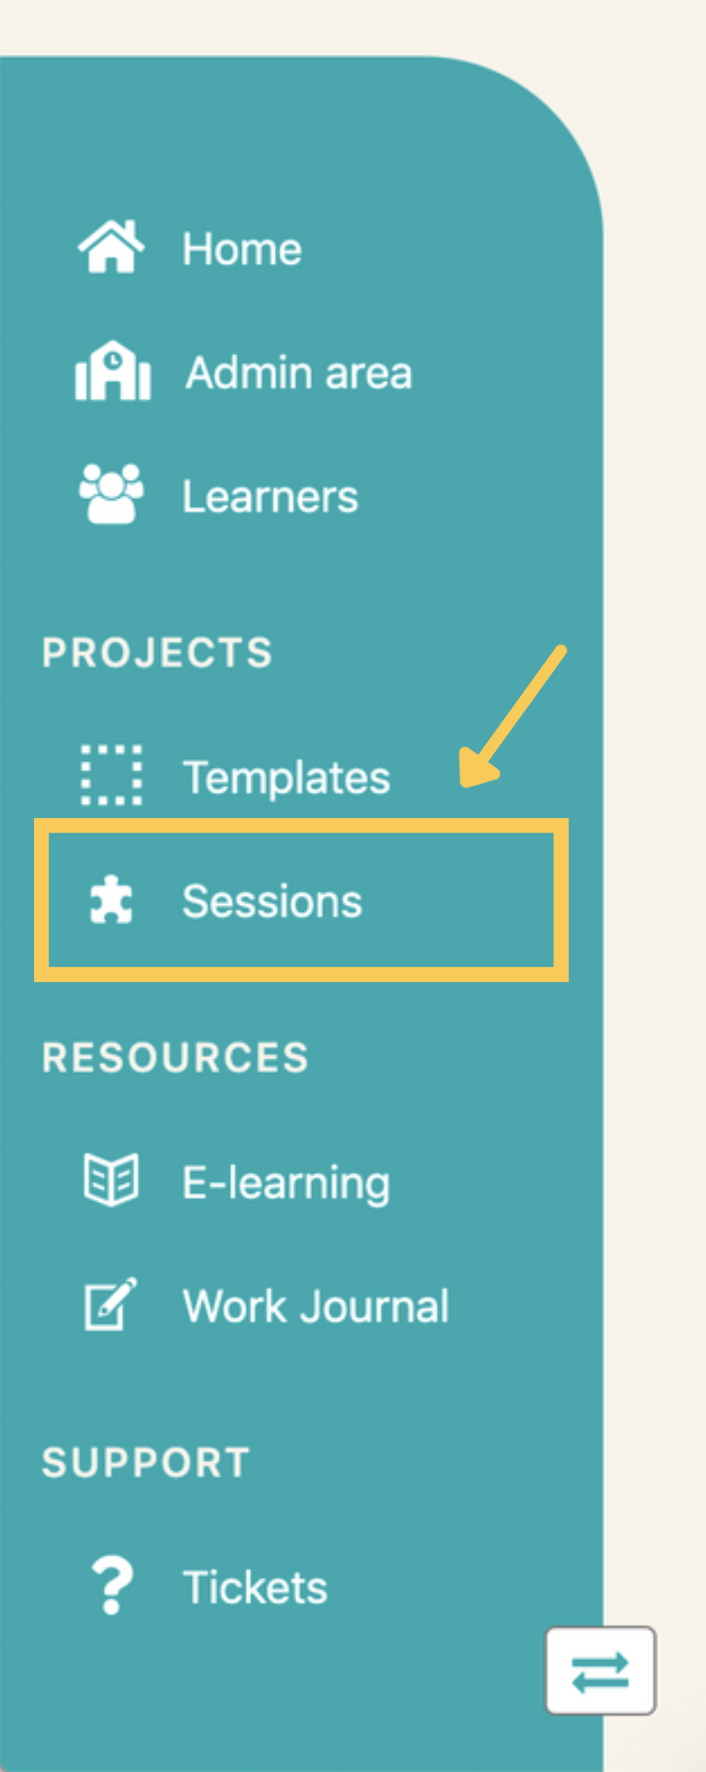
Log in with an admin account, and click on the Sessions link in the left-side menu.
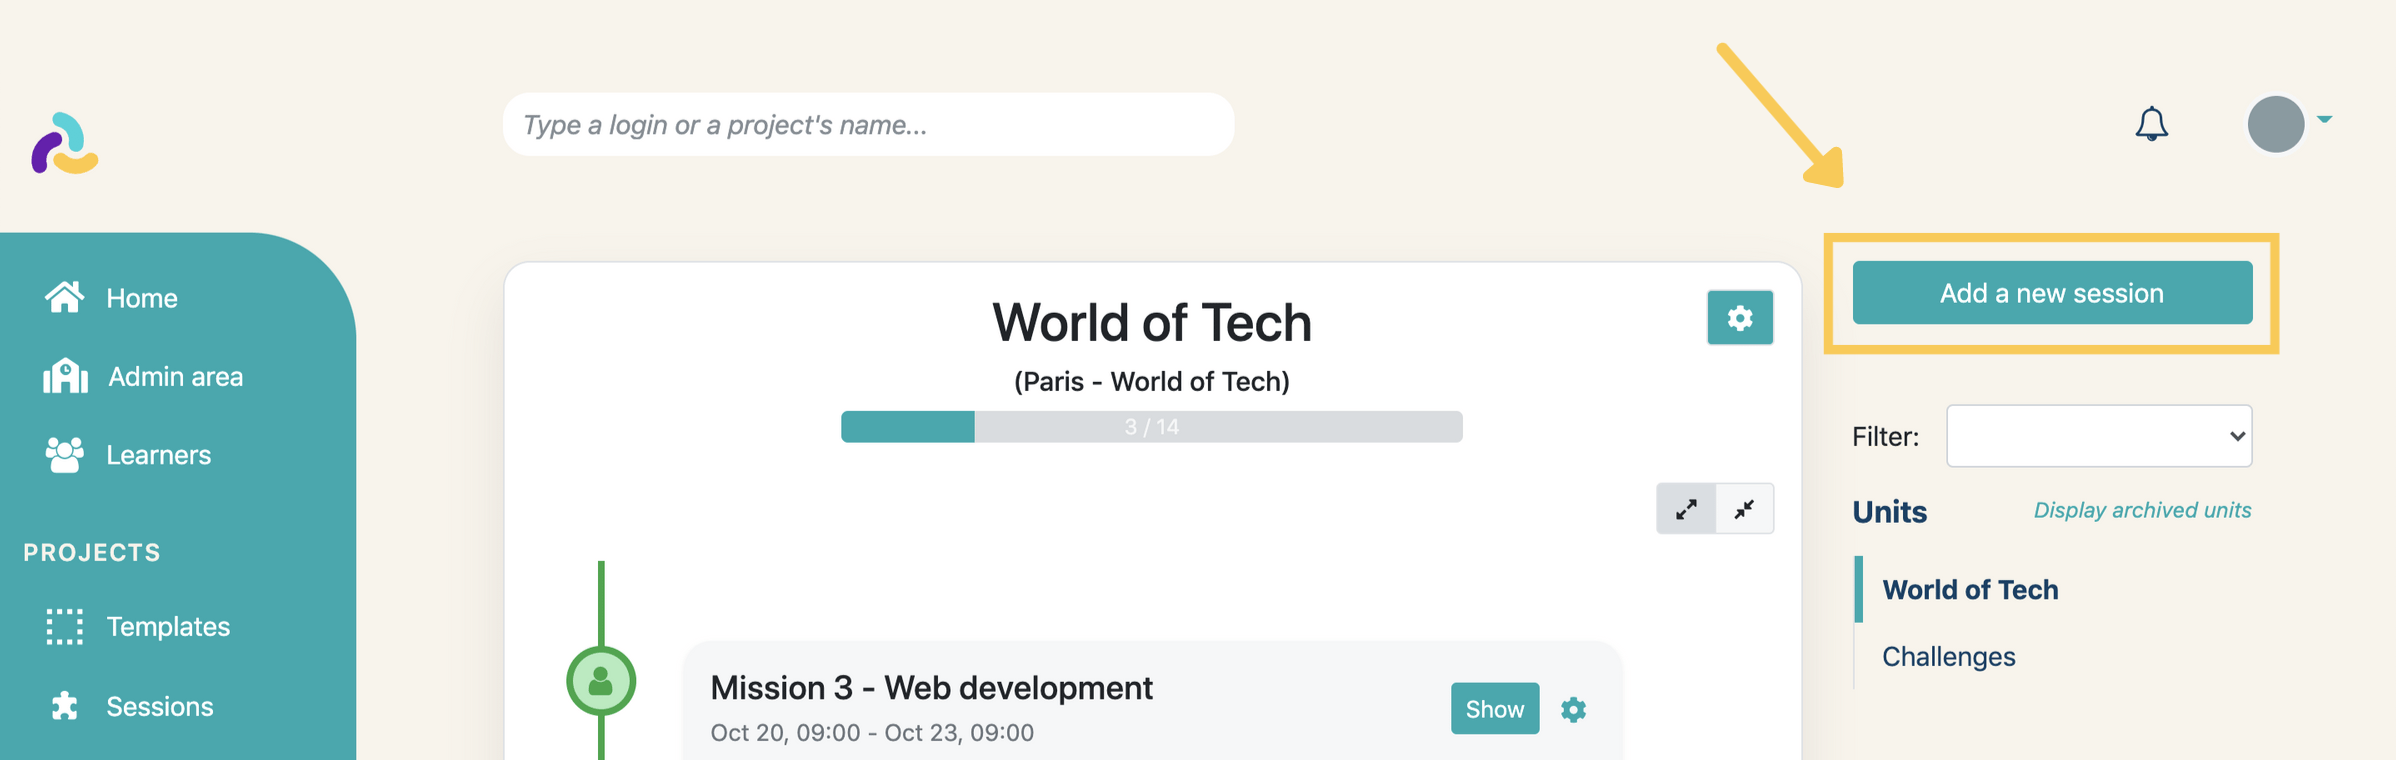
This takes you to a page with current sessions, where you find a
Add a new session button.
On the subsequent page, your action is different depending on whether:
- it’s your first time creating a session for the given unit
- you simply want to reschedule a previous session
Create a unit session from scratch
1. Choose the unit template
So you have clicked on Add a new session and you have arrived on the session creation page.
The left panel allows you to choose the unit template you want to turn into a session:
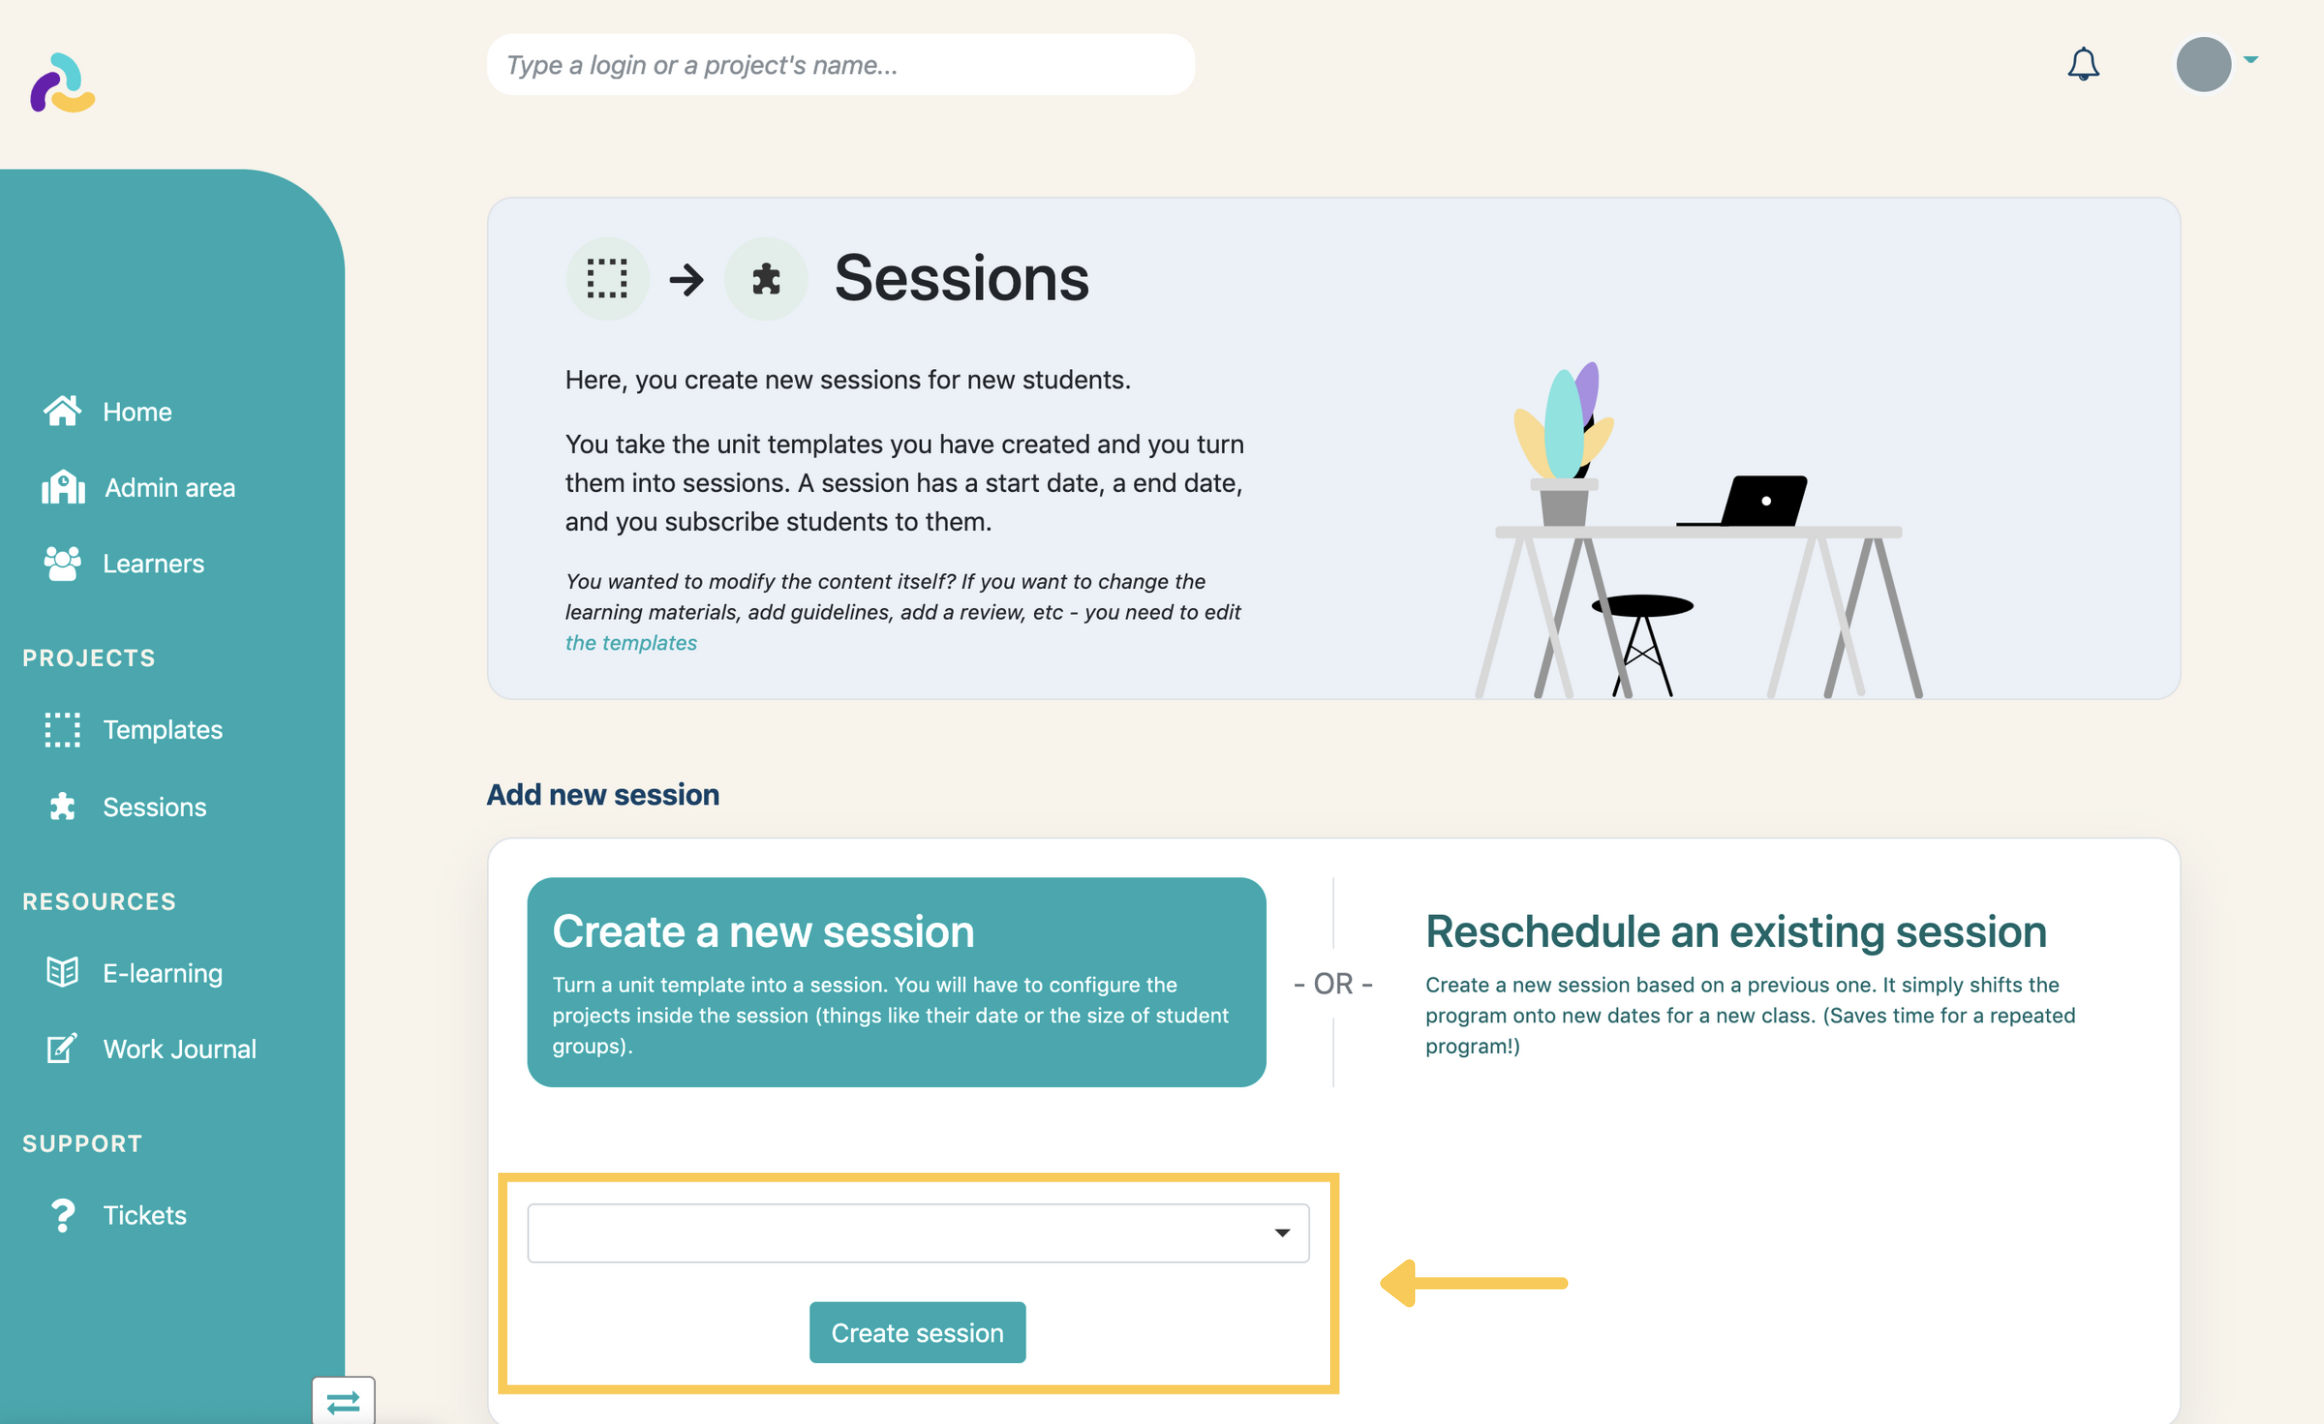
Choose your template in the dropdown list, and click on Create session.
2. Configure session and projects
On the following page, you'll do two things:
- Configure overall session information
- Configure each project independently
Let's start with the high-level information, in the upper half of the page.
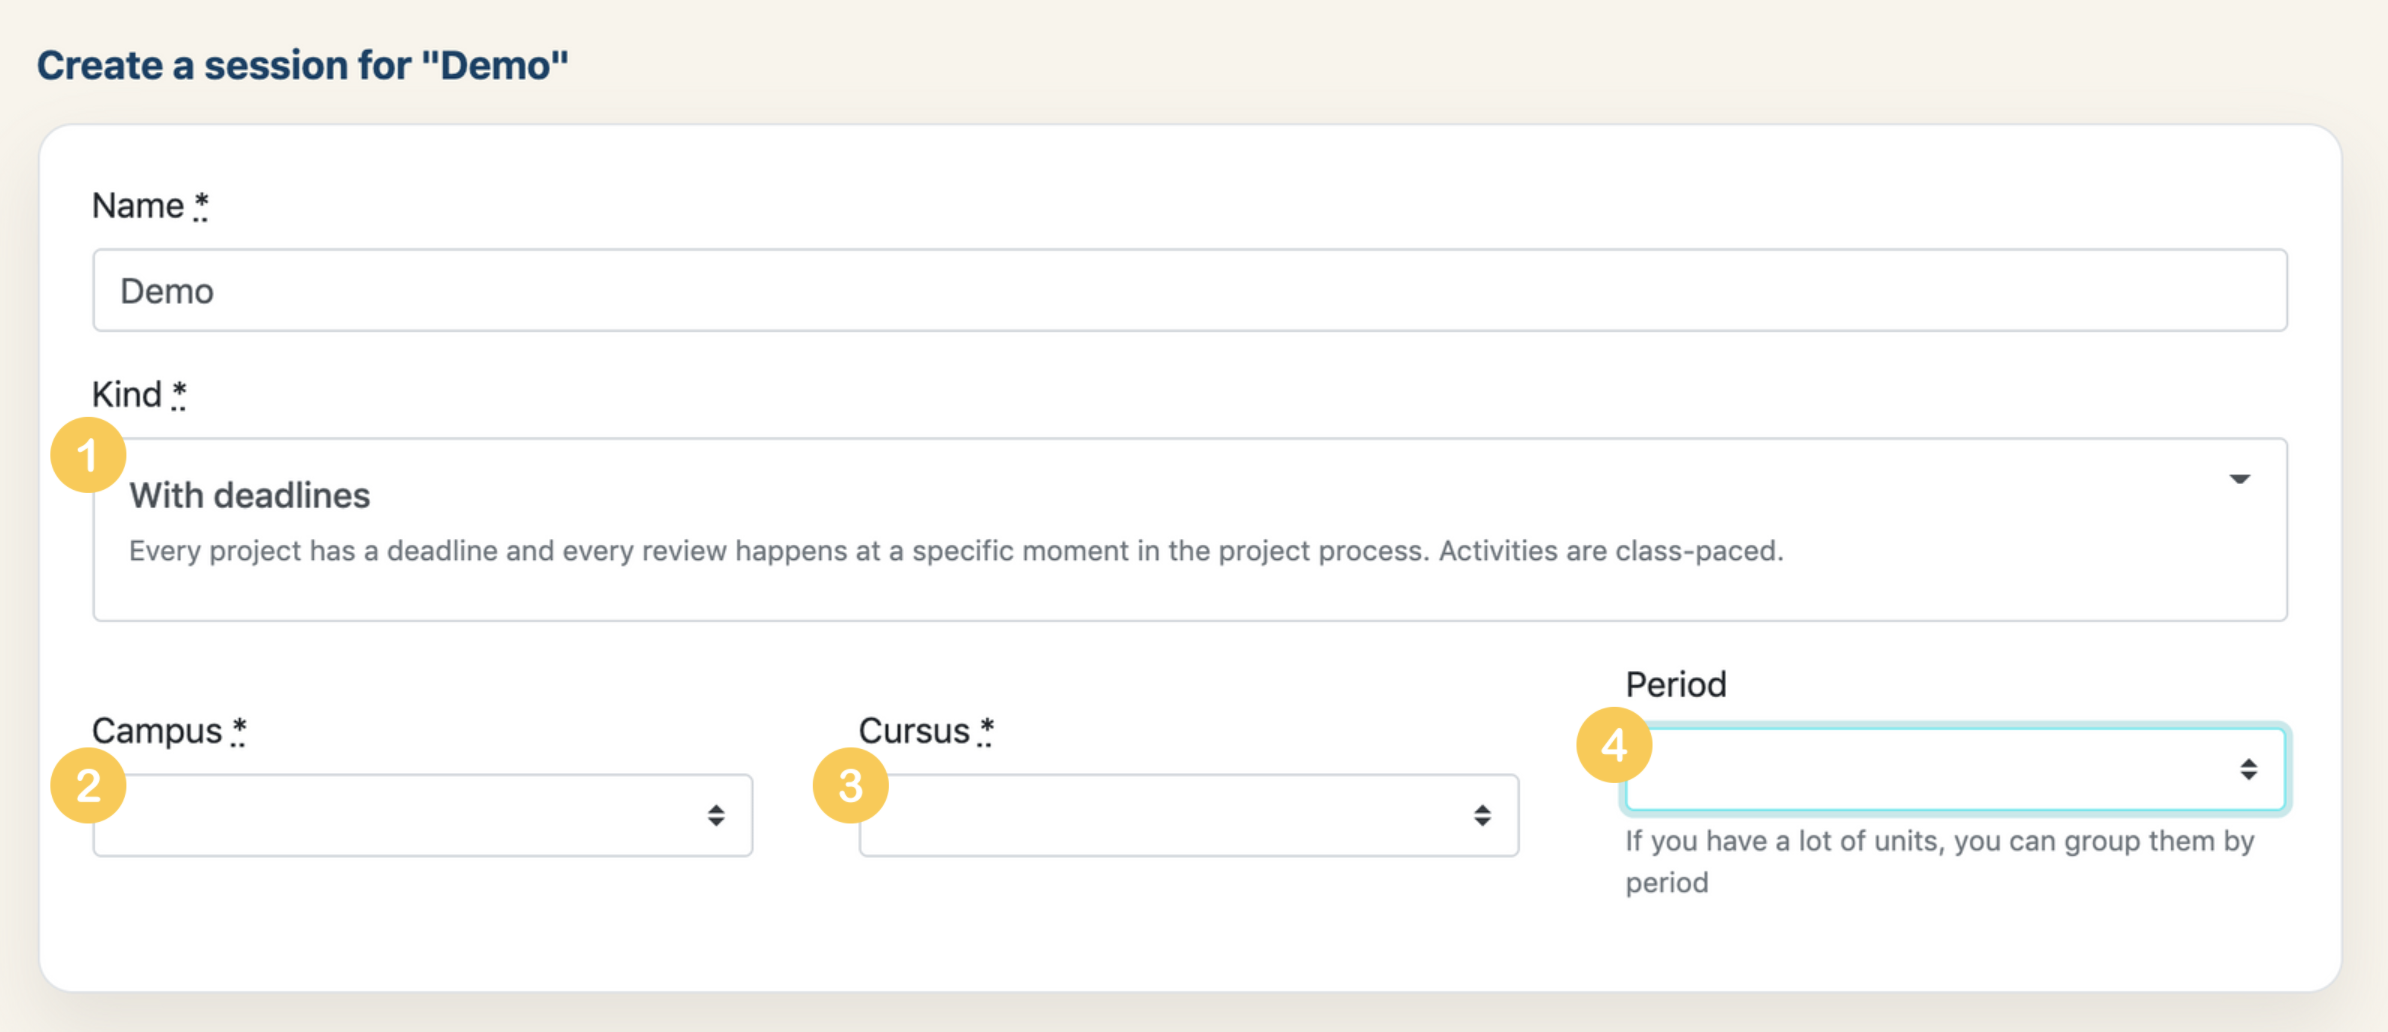
- By default, activities are class-paced. You can also choose to make your unit self-paced (in which case you won't specify deadlines for projects).
- The campus the session will run in.
- The cursus the session will run in.
- (optional) If your cursus spans over a year or more, it might be useful to group your units into periods.
Next comes something that's a little cumbersome (that's why we created the reschedule option!): the configuration of each project in the unit.
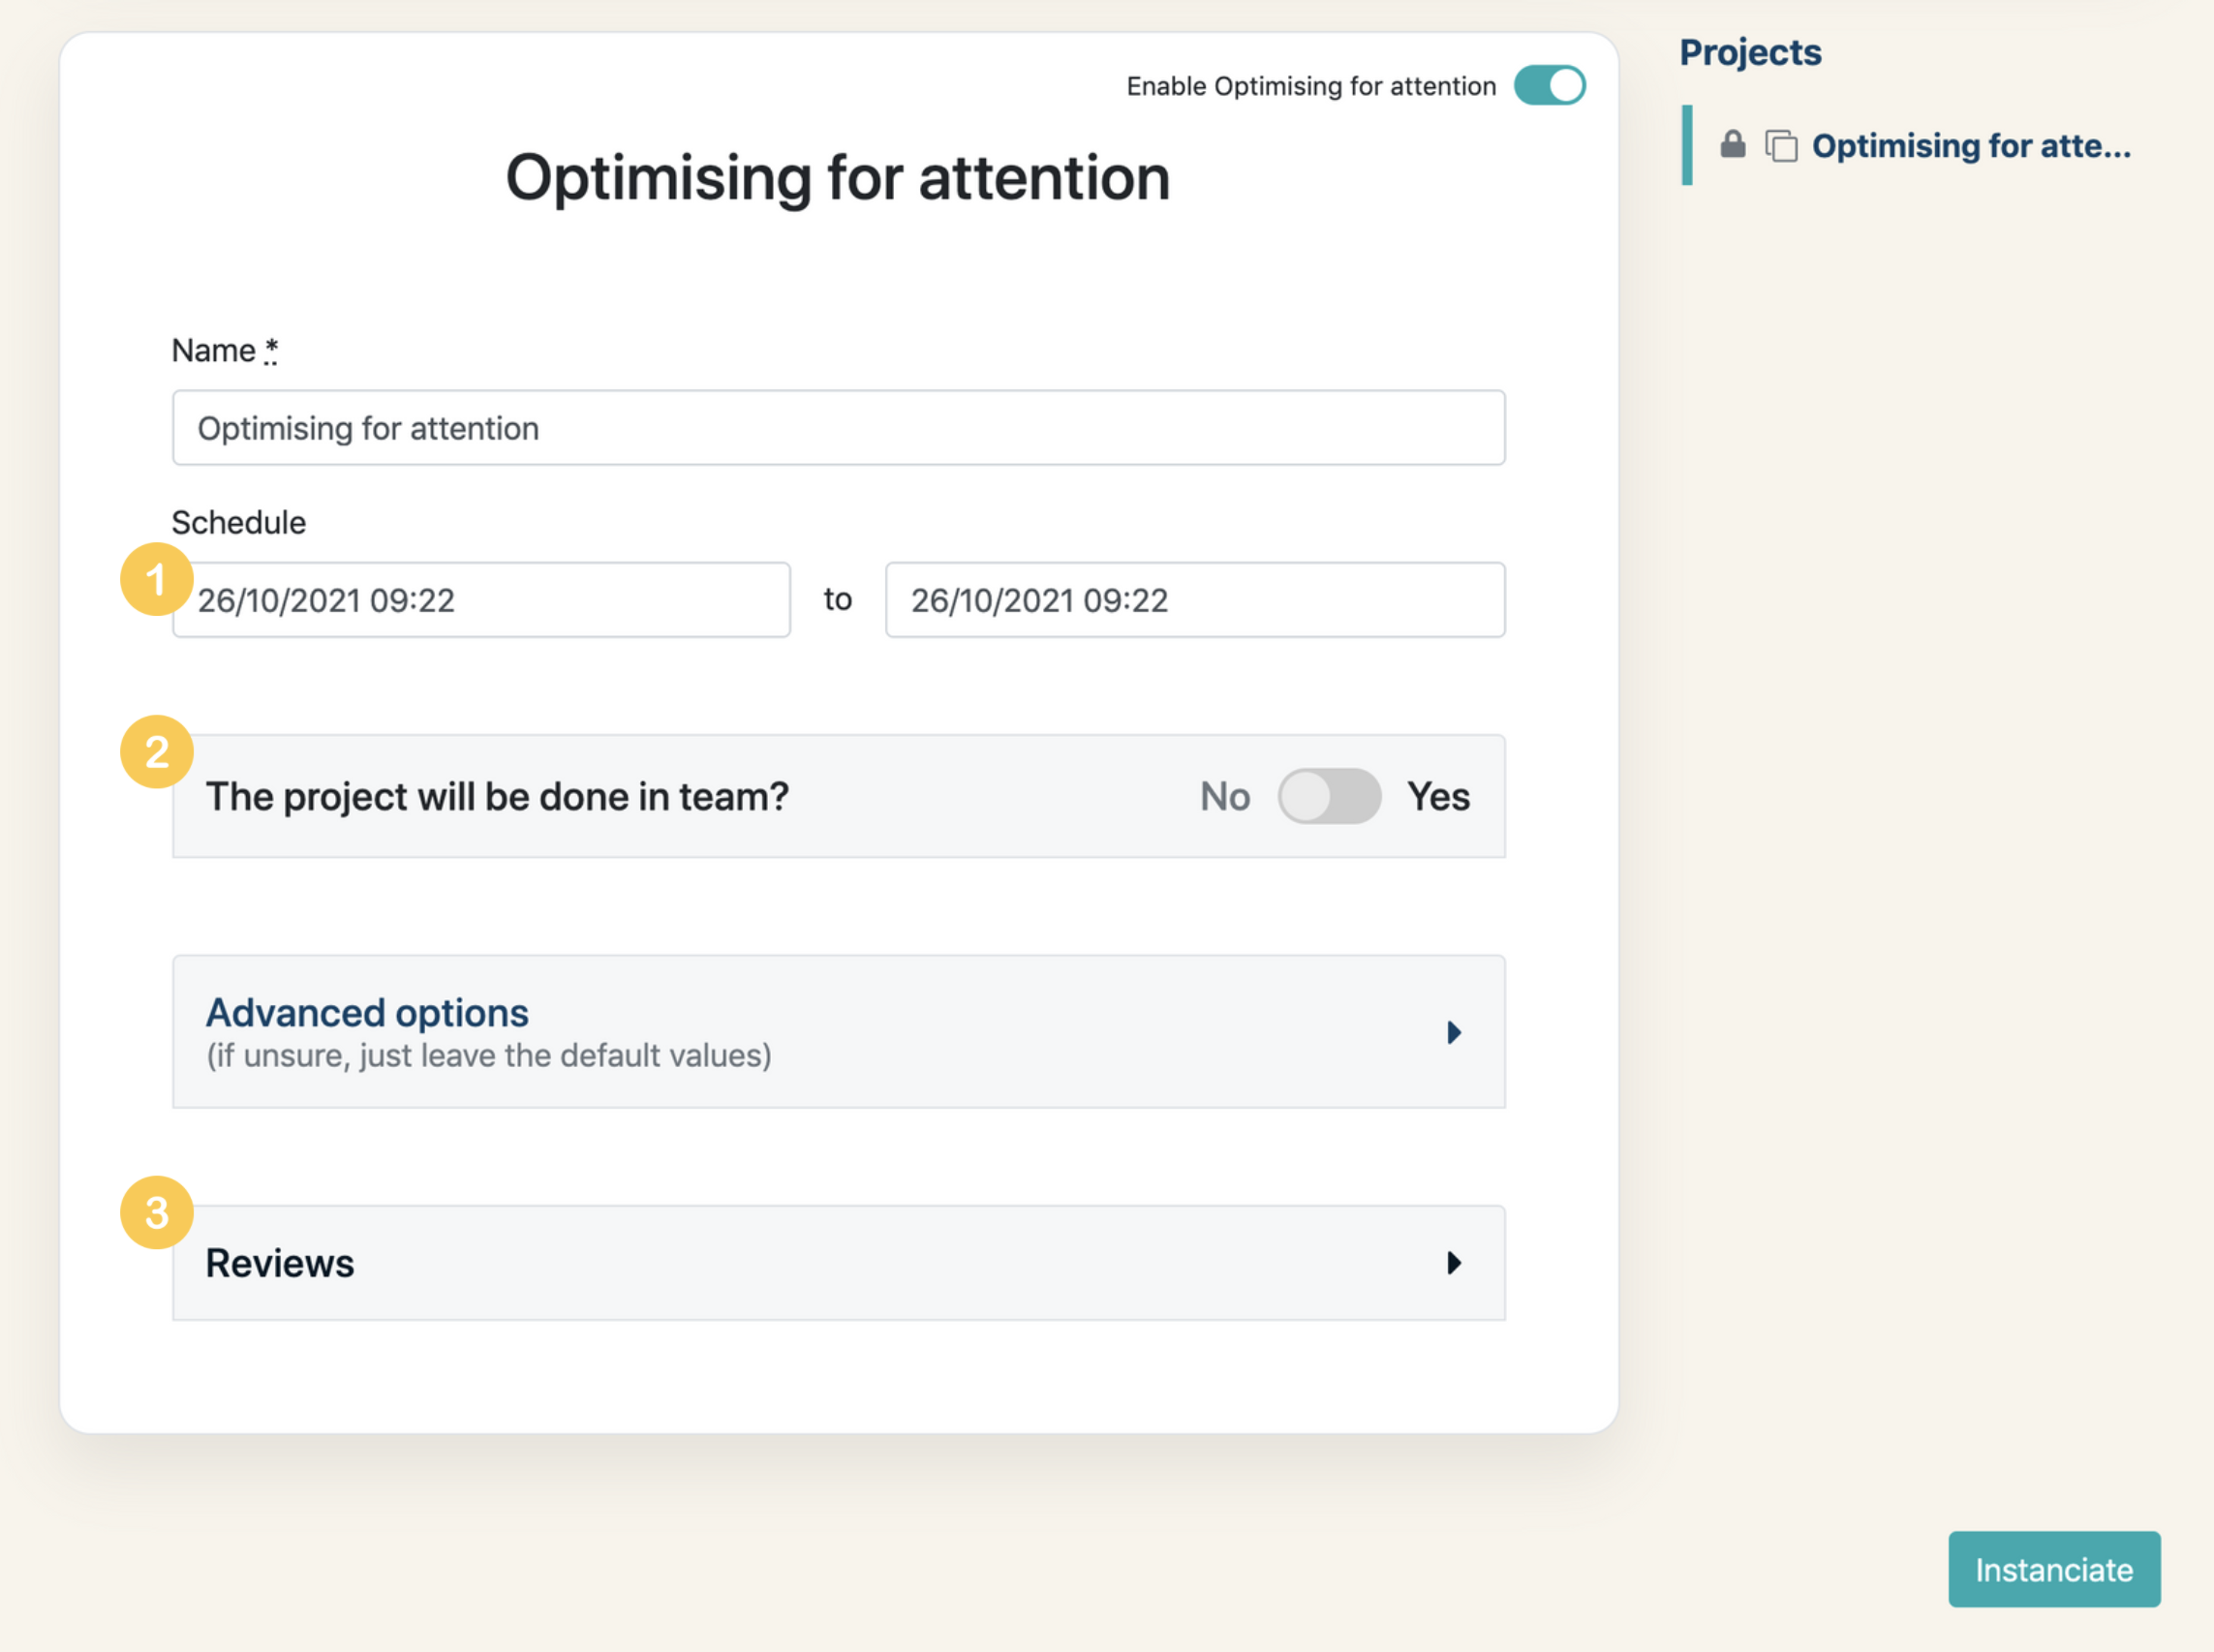
In most cases, you will simply specify:
- The project's start date and end date. The project's subject and resources are unlocked for subscribed students at the start date. After the end date, students can't submit their work anymore (but they can still access the subject and resources).
- Whether it's a solo or a team project
- If the project has reviews, those have to be scheduled as well
In the advanced options panel, you can further configure the project:

- How students are subscribed to the project (automatically whenever they are subscribed to the unit session, manually by school staff, or if students themselves opt-in)
- How attendance is taken
- If a video conferencing room is automatically created
- Whether deliverables are shared with the class or private to the student and their mentors
- If you want to gather student feedback on the project (to know if you need to adjust anything), you specify here which feedback forms are presented to students at the end of the project.
And that's it!
You do this for all projects, and when everything is in order you click on the bottom-right Instanciate button. Your session is now live and running.
Reschedule an existing session
1. Choose the session to reschedule
So you have clicked on Add a new session and you have arrived on the session creation page.
The right panel allows you to choose a previous session to reschedule.
Choose the session you want to reschedule in the dropdown list, and click on Reschedule session.
Here's a quick video of how it looks like:
2. Configure new session
The whole point of using the reschedule option is that you don't have to configure projects and reviews dates!
The only thing you have to specify are those fields:
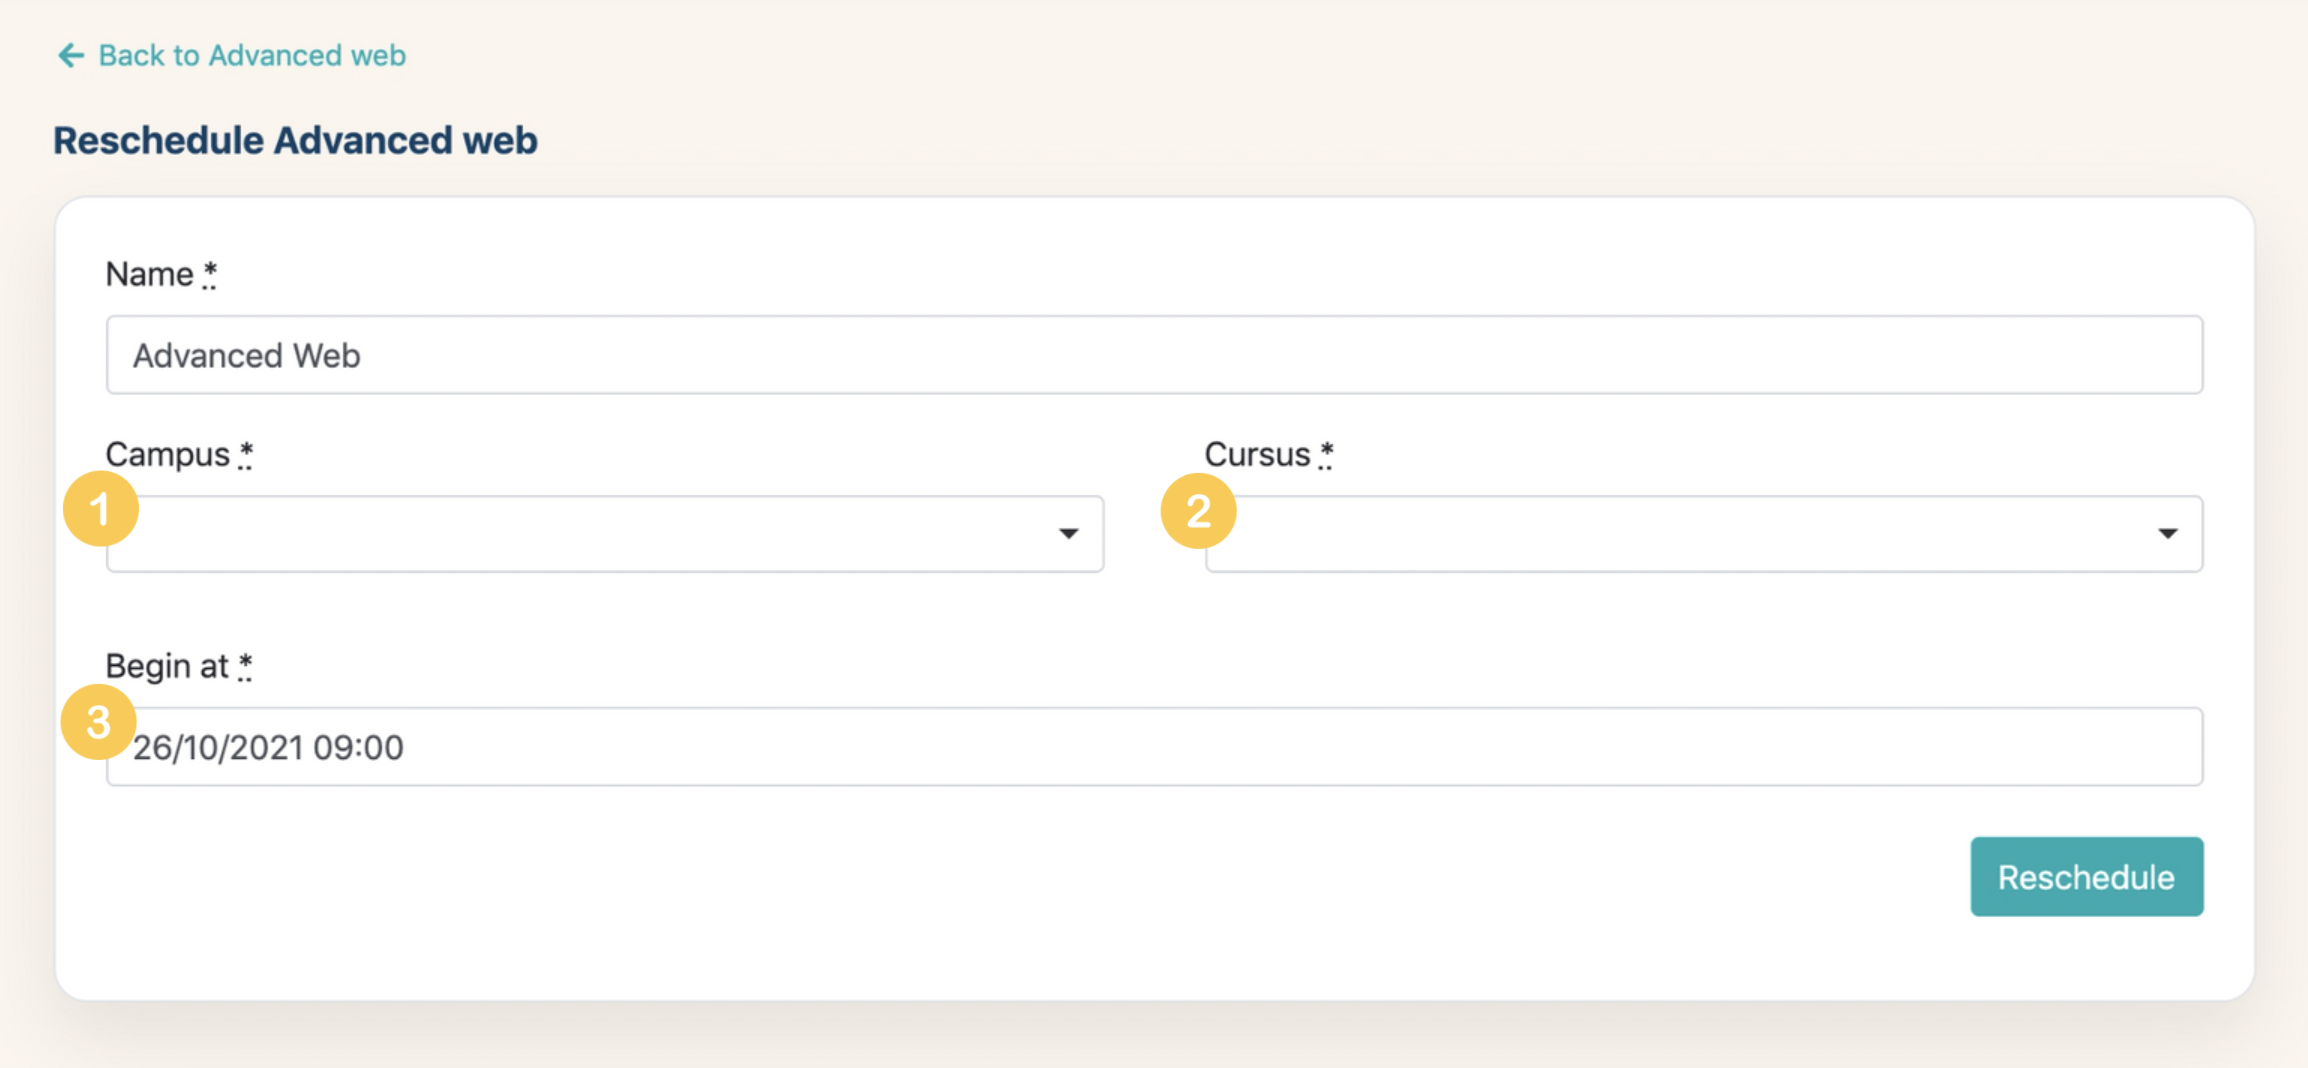
- The campus the new session will run in.
- The cursus the new session will run in.
- The start date & time of the new session.
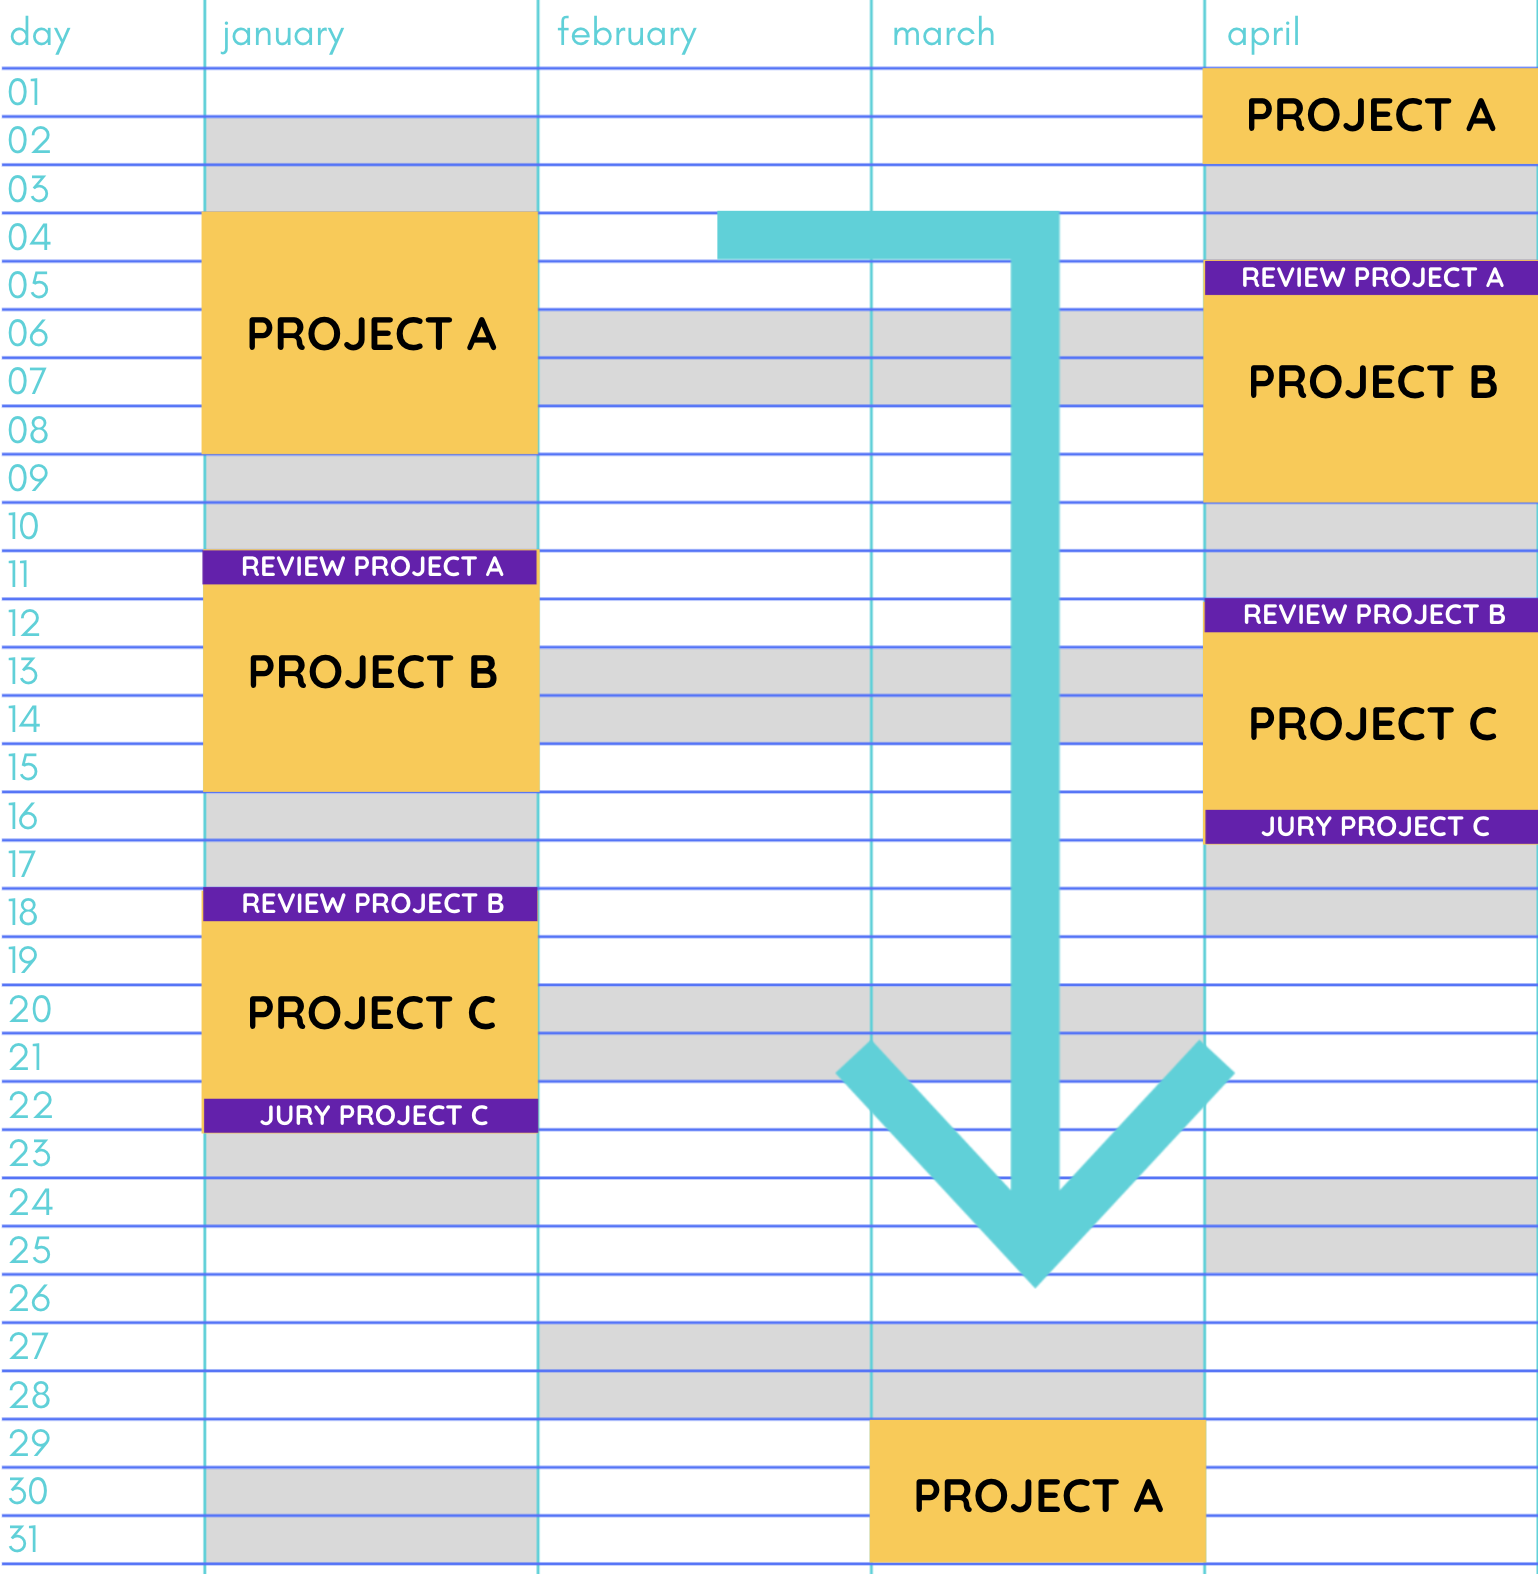
Your new session will look exactly like the old one, starting at the specified date.
For example, if you take the following session that started on January 4, and reschedule it to start on March 29, it will look like this:
And that's it, as soon as you hit the Reschedule button, your session is live and running.