Create Student Accounts
Before diving straight into account creation, we need to quickly go over how schools are organised on the LMS.
(If you are already familiar with school organisation and just want a refresher on how to create accounts, jump here.)
School organisation on the LMS
Campuses and cursuses
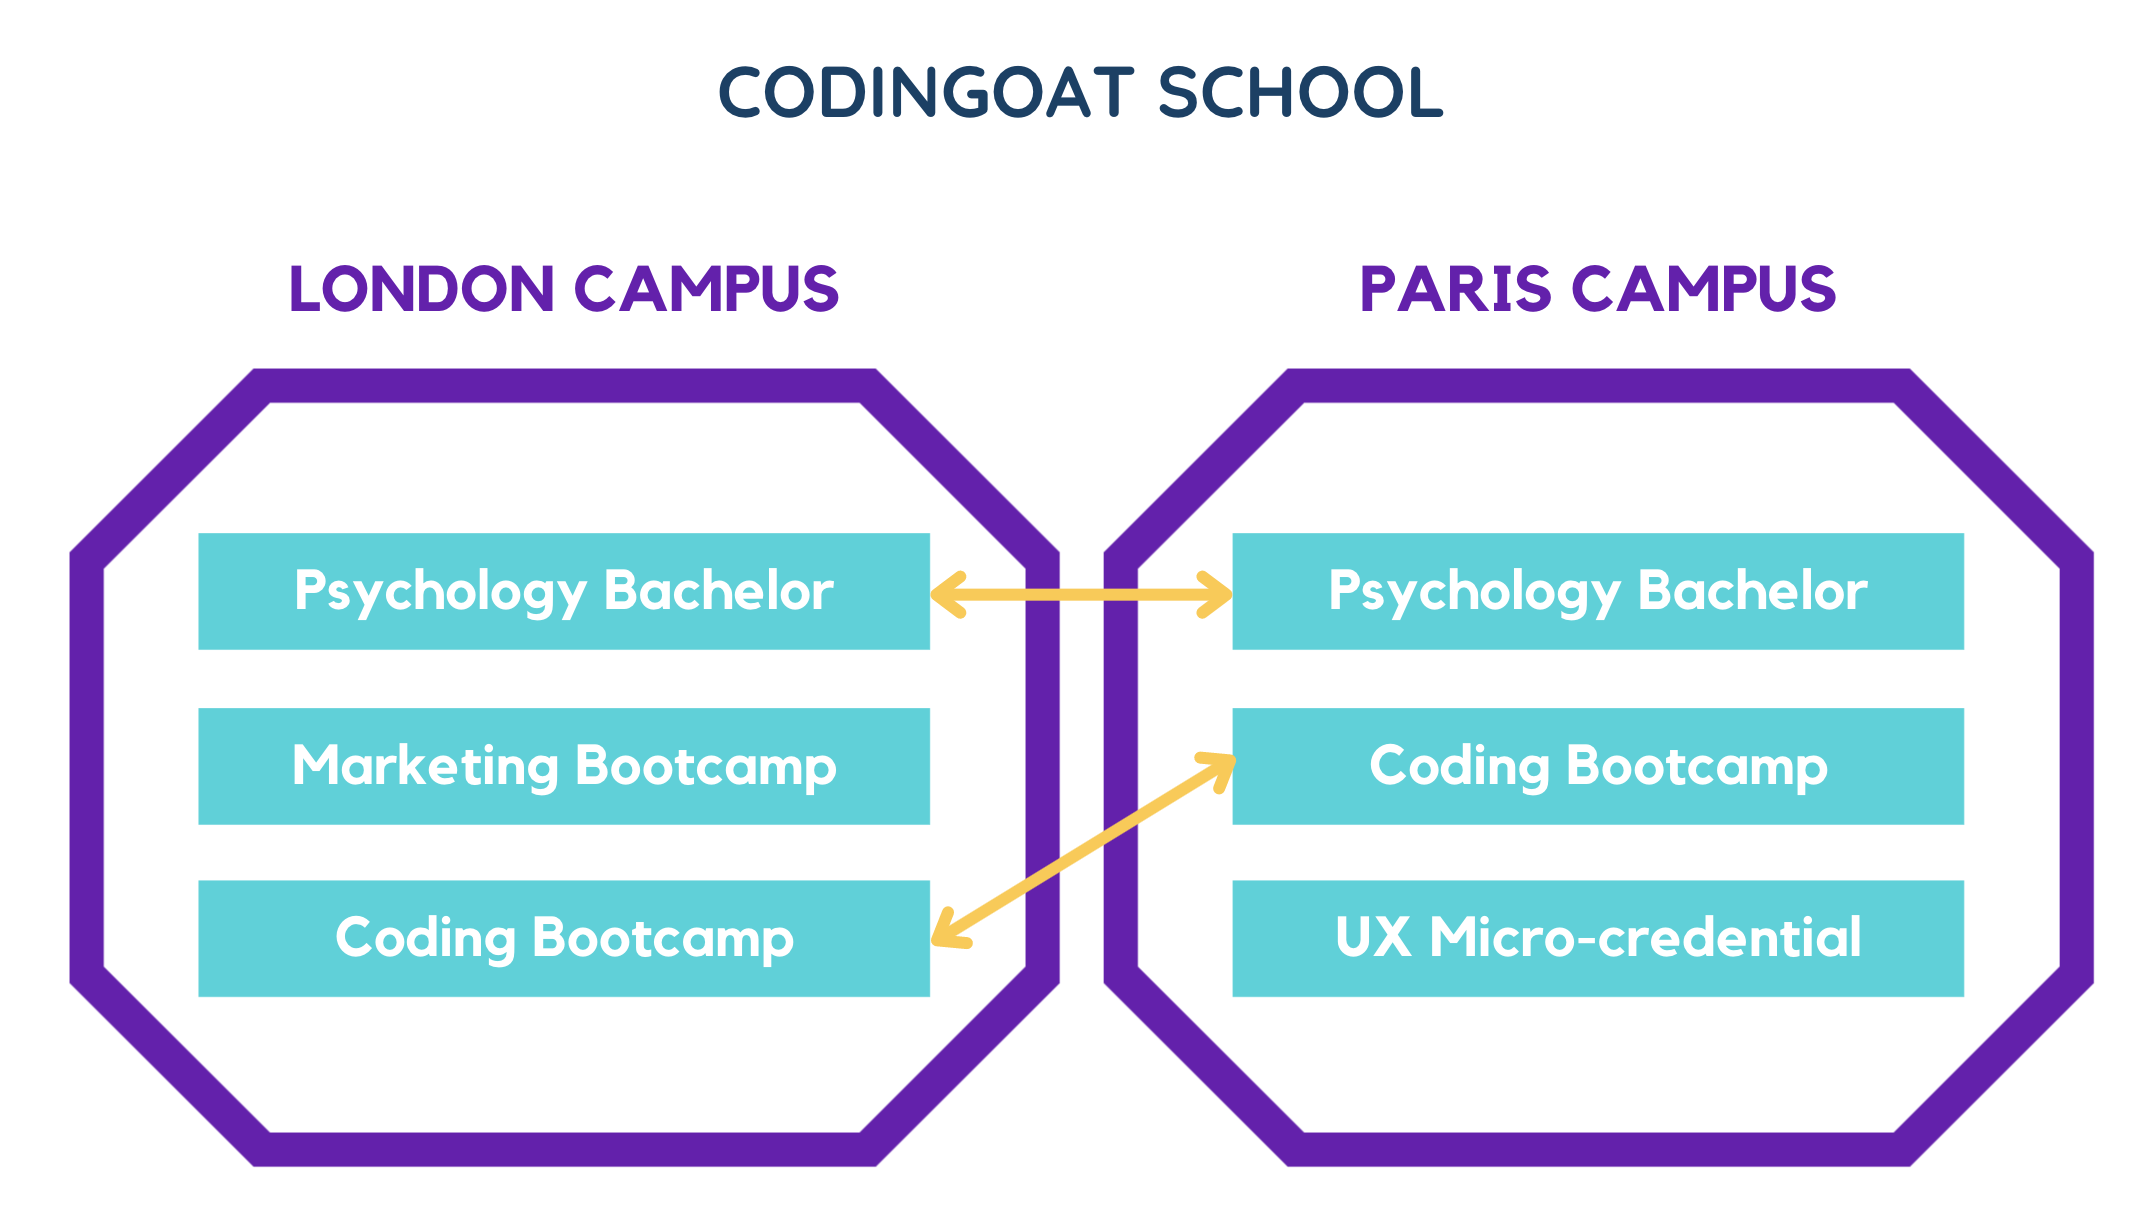
Rbean caters to both online and on-site, multi-campus schools. It also lets each campus run several cursuses.
In practice, a school might look like this, with different campuses that repeat the same cursuses:
So, when you create student accounts, how do you organise them?
Well, the platform makes the following assumptions:
- Students belong to a specific campus
- They participate in a given cursus
Thus, when you create a student account, you have to put them in a campus and in a cursus.
You basically say “those students will study XXX at the XXX campus”.
Isn’t it how we think about it, anyway?
Student groups
To further segment students, you should use groups. It’s optional, but it really helps - otherwise you can only handle students as individuals, not as a cohort.
Groups allow you to:
- Subscribe cohorts of students to unit sessions
- See reports per group
- Assign mentors to a given group
Typically, you’ll create groups such as the “Psychology - 2021 Class” or “Marketing Bootcamp #13”.
Create student accounts
Mandatory information
To create any user account, you need three bits of personal info:
- A first name
- A last name
- An email address
You can’t create an account if you don’t have all three.
Account creation walk-through
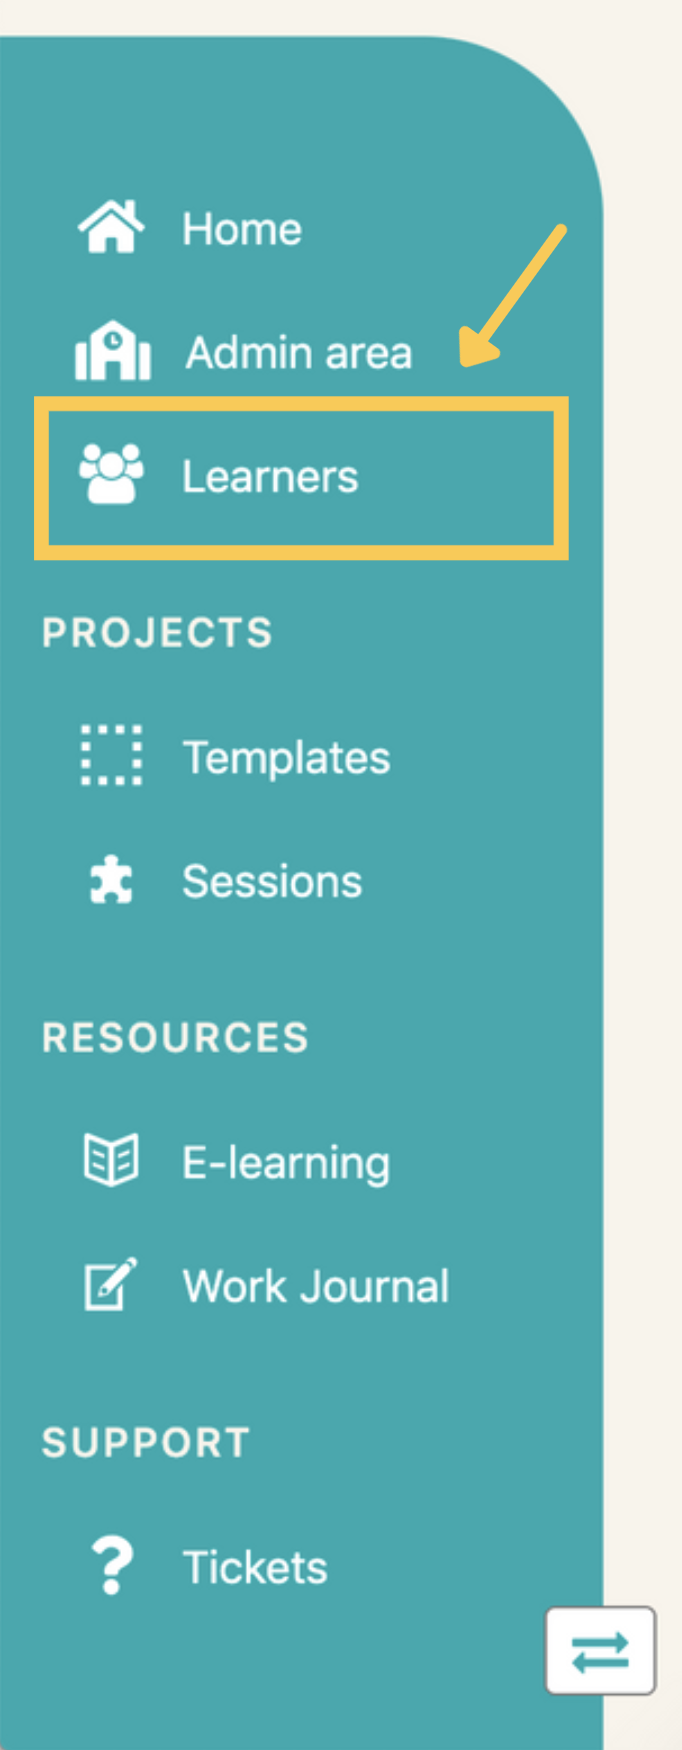
Log in with an admin account, and click on the Learners link in the left-side menu.
This takes you to a page with all user accounts, where you find a
Create accounts button.
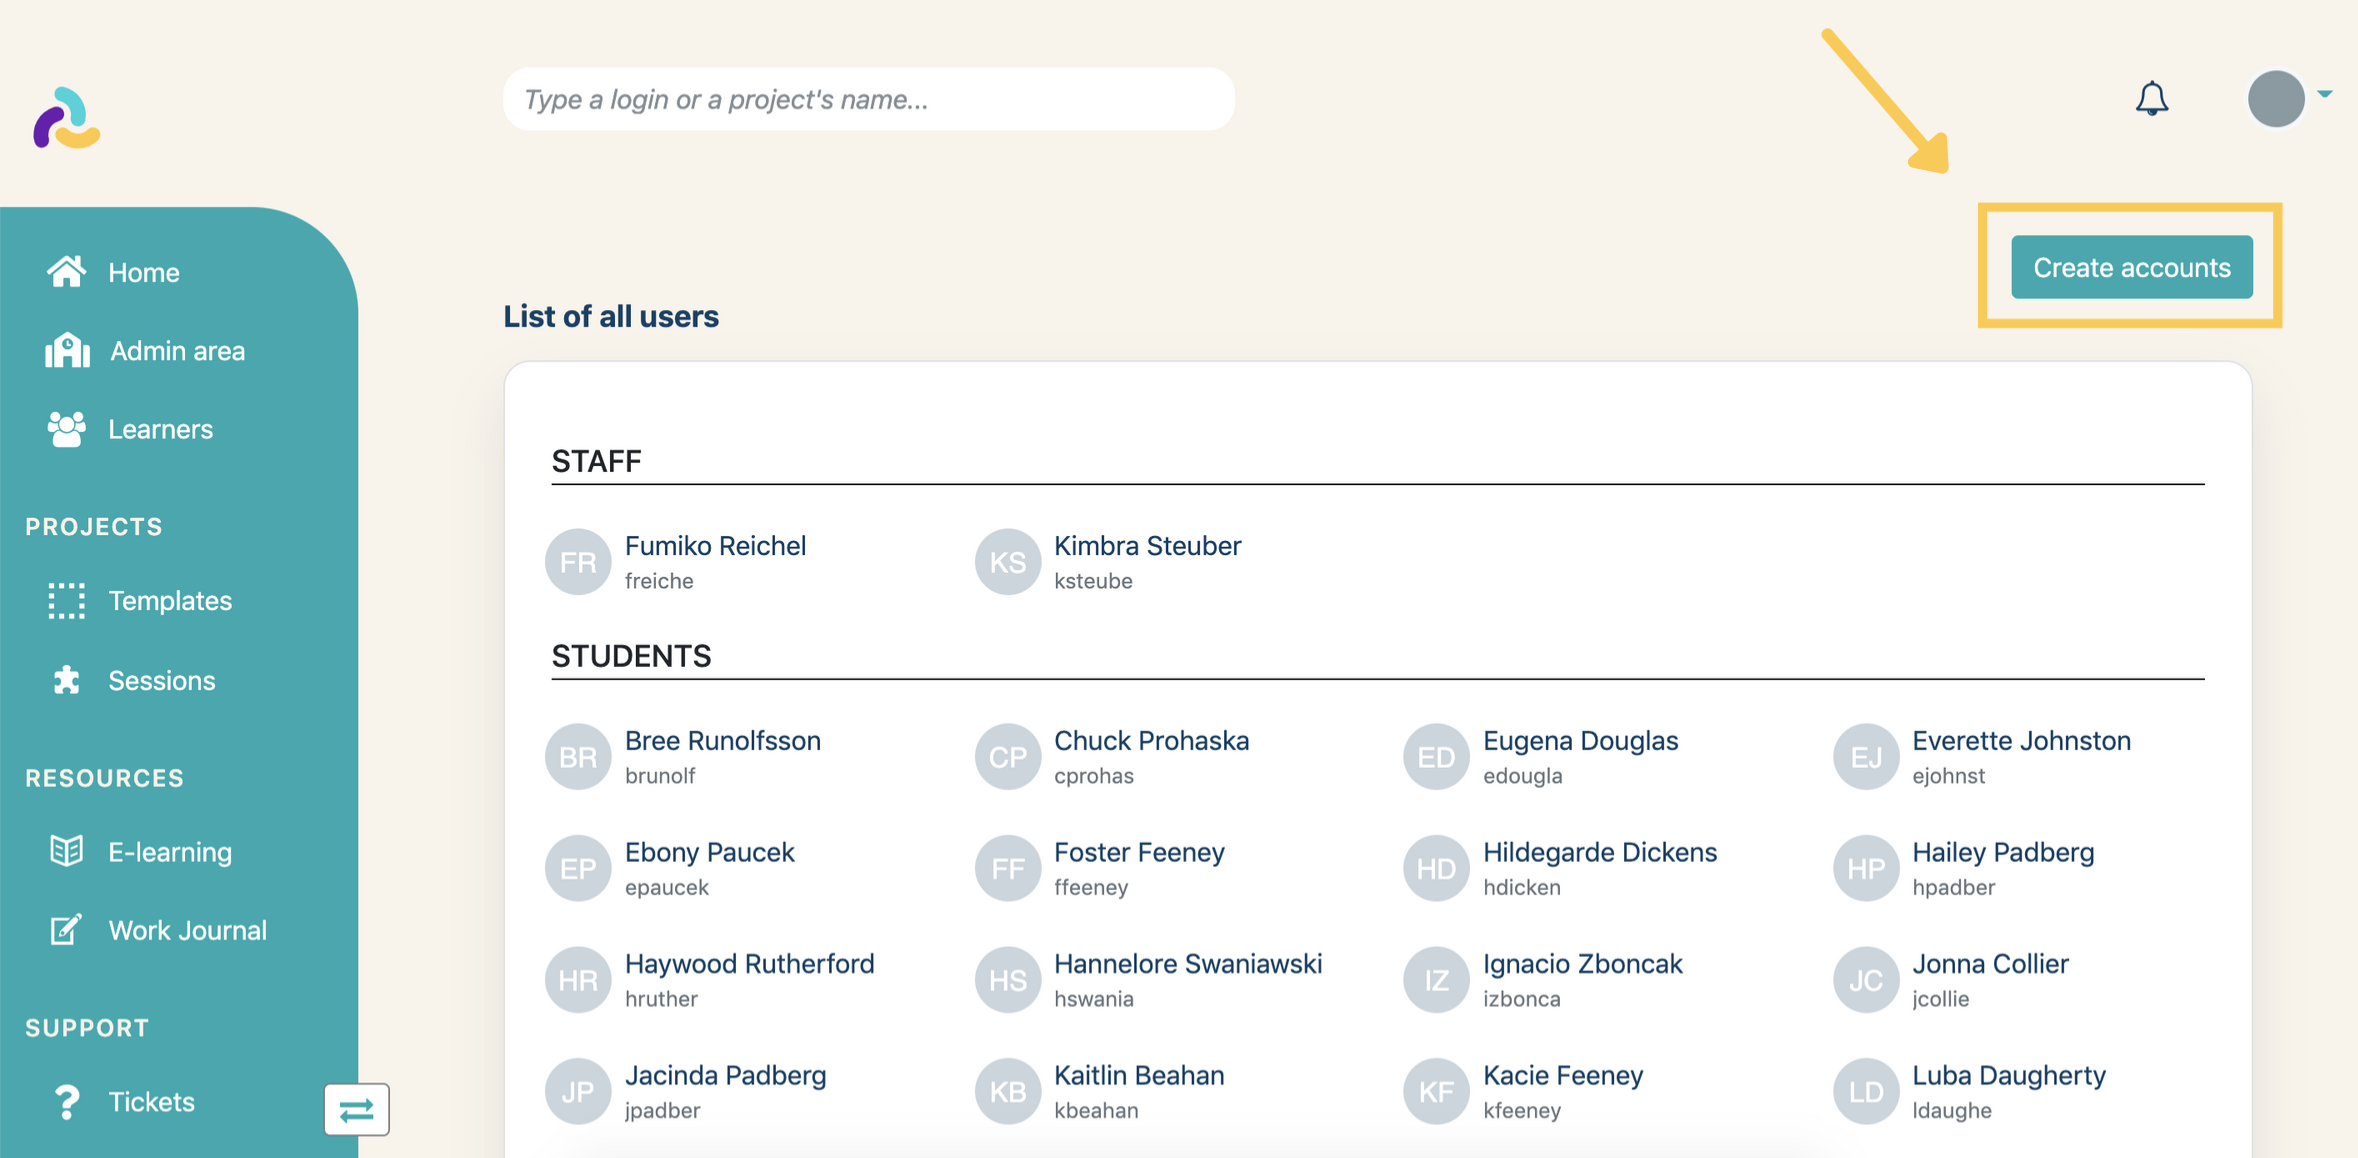
On the subsequent page, you can choose to create student accounts by clicking on the left section.
It brings you to the user creation form:
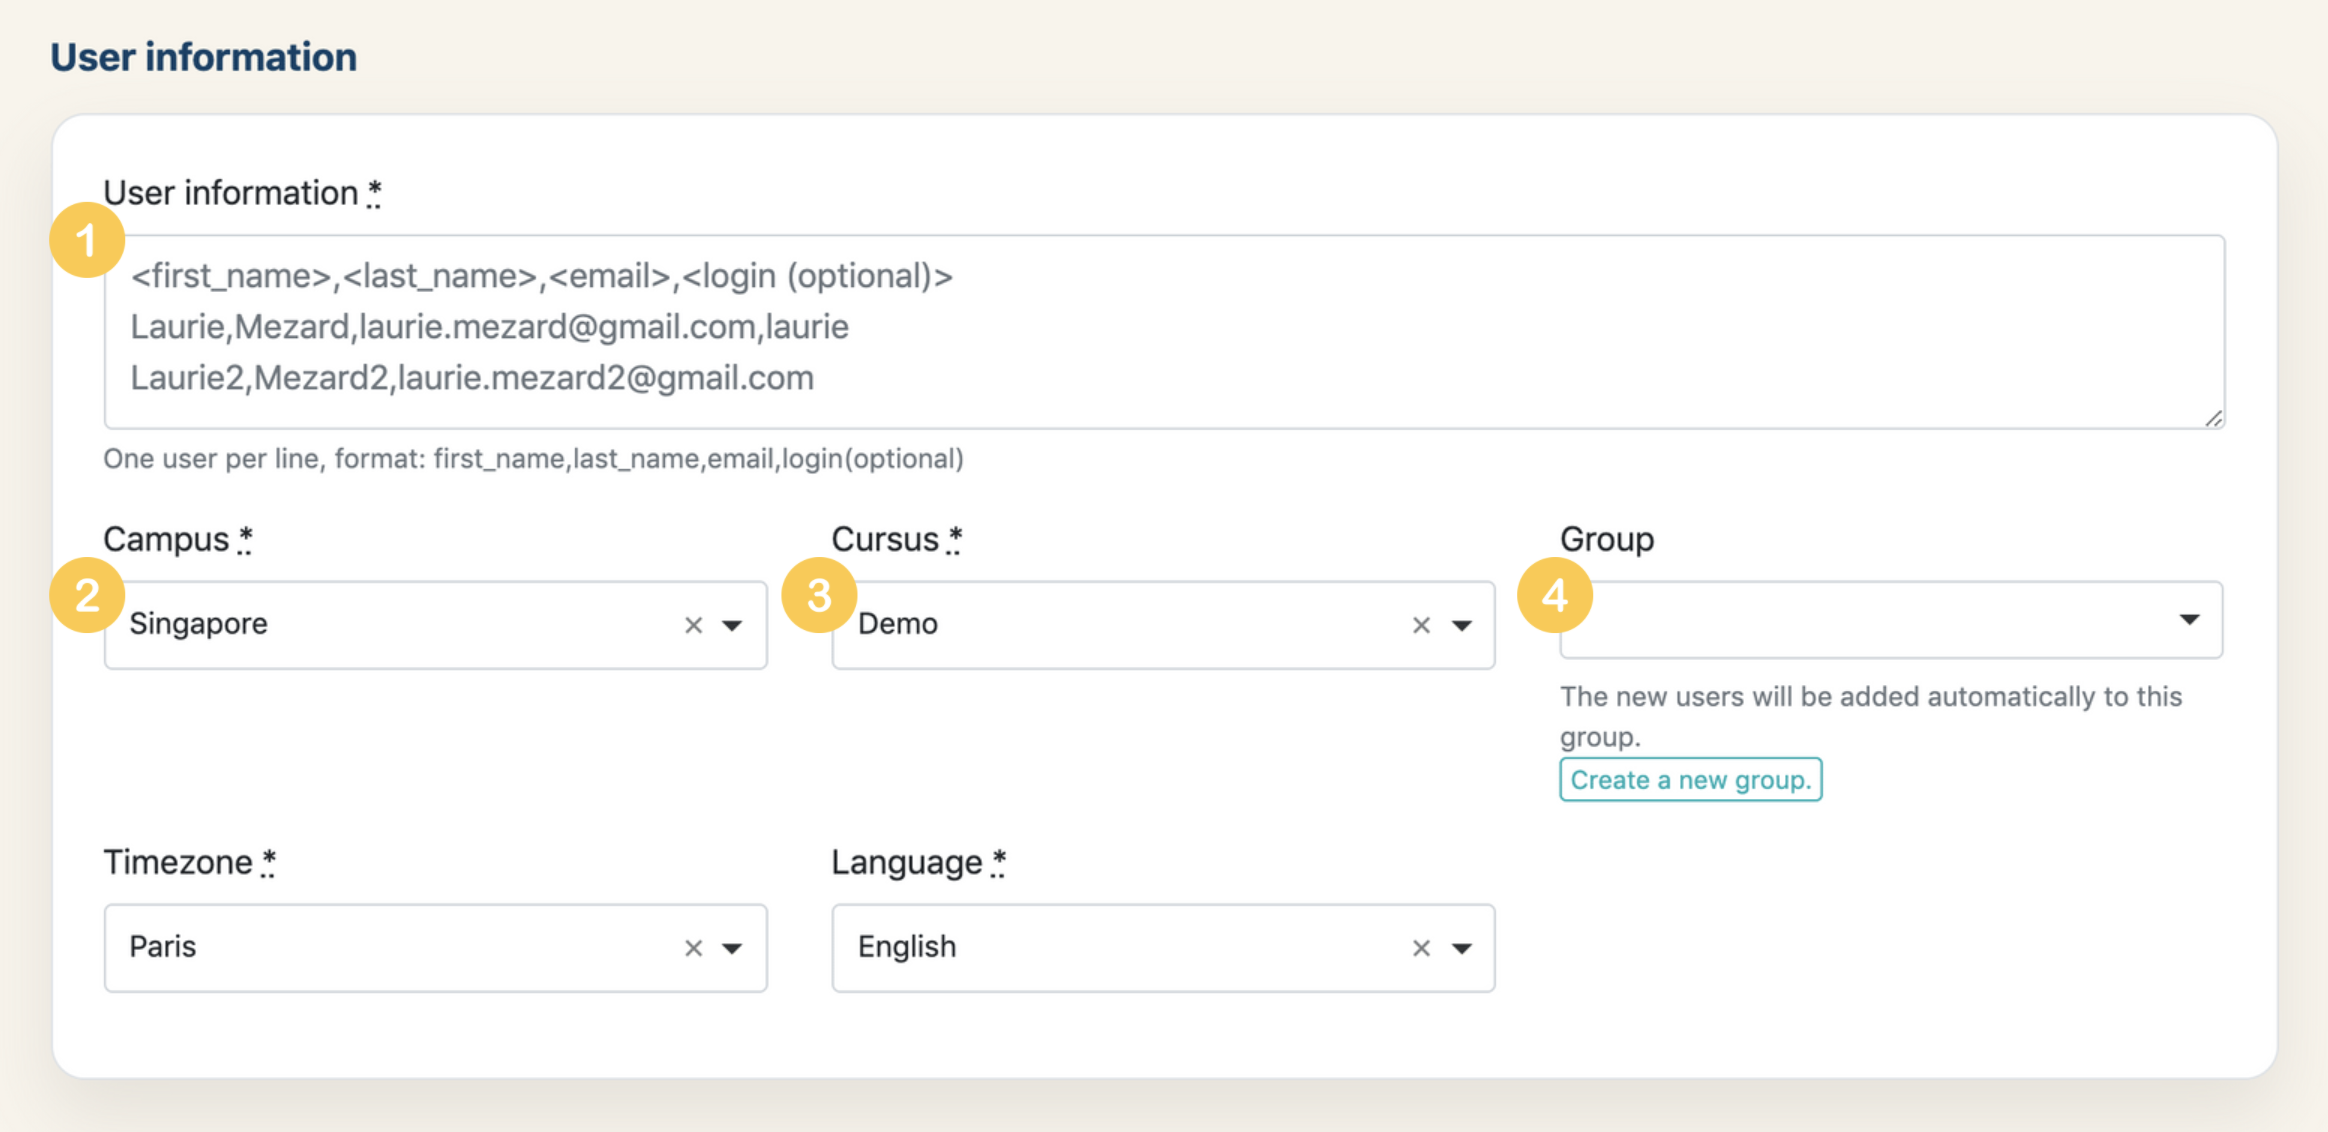
- This is where you enter student information, one student per line. Each line must be formatted as "first name, last name, email address".
- The campus in which new accounts will be placed.
- The cursus in which new accounts will be placed.
- The group (i.e., the cohort) to which new accounts will be attached.
The timezone is necessary so that all deadlines are shown to students in their own timezone. (Students can edit their timezone if they need to.)
The language is the language of the interface. As of today, English and French are available.
The second half of the form completes the setup:
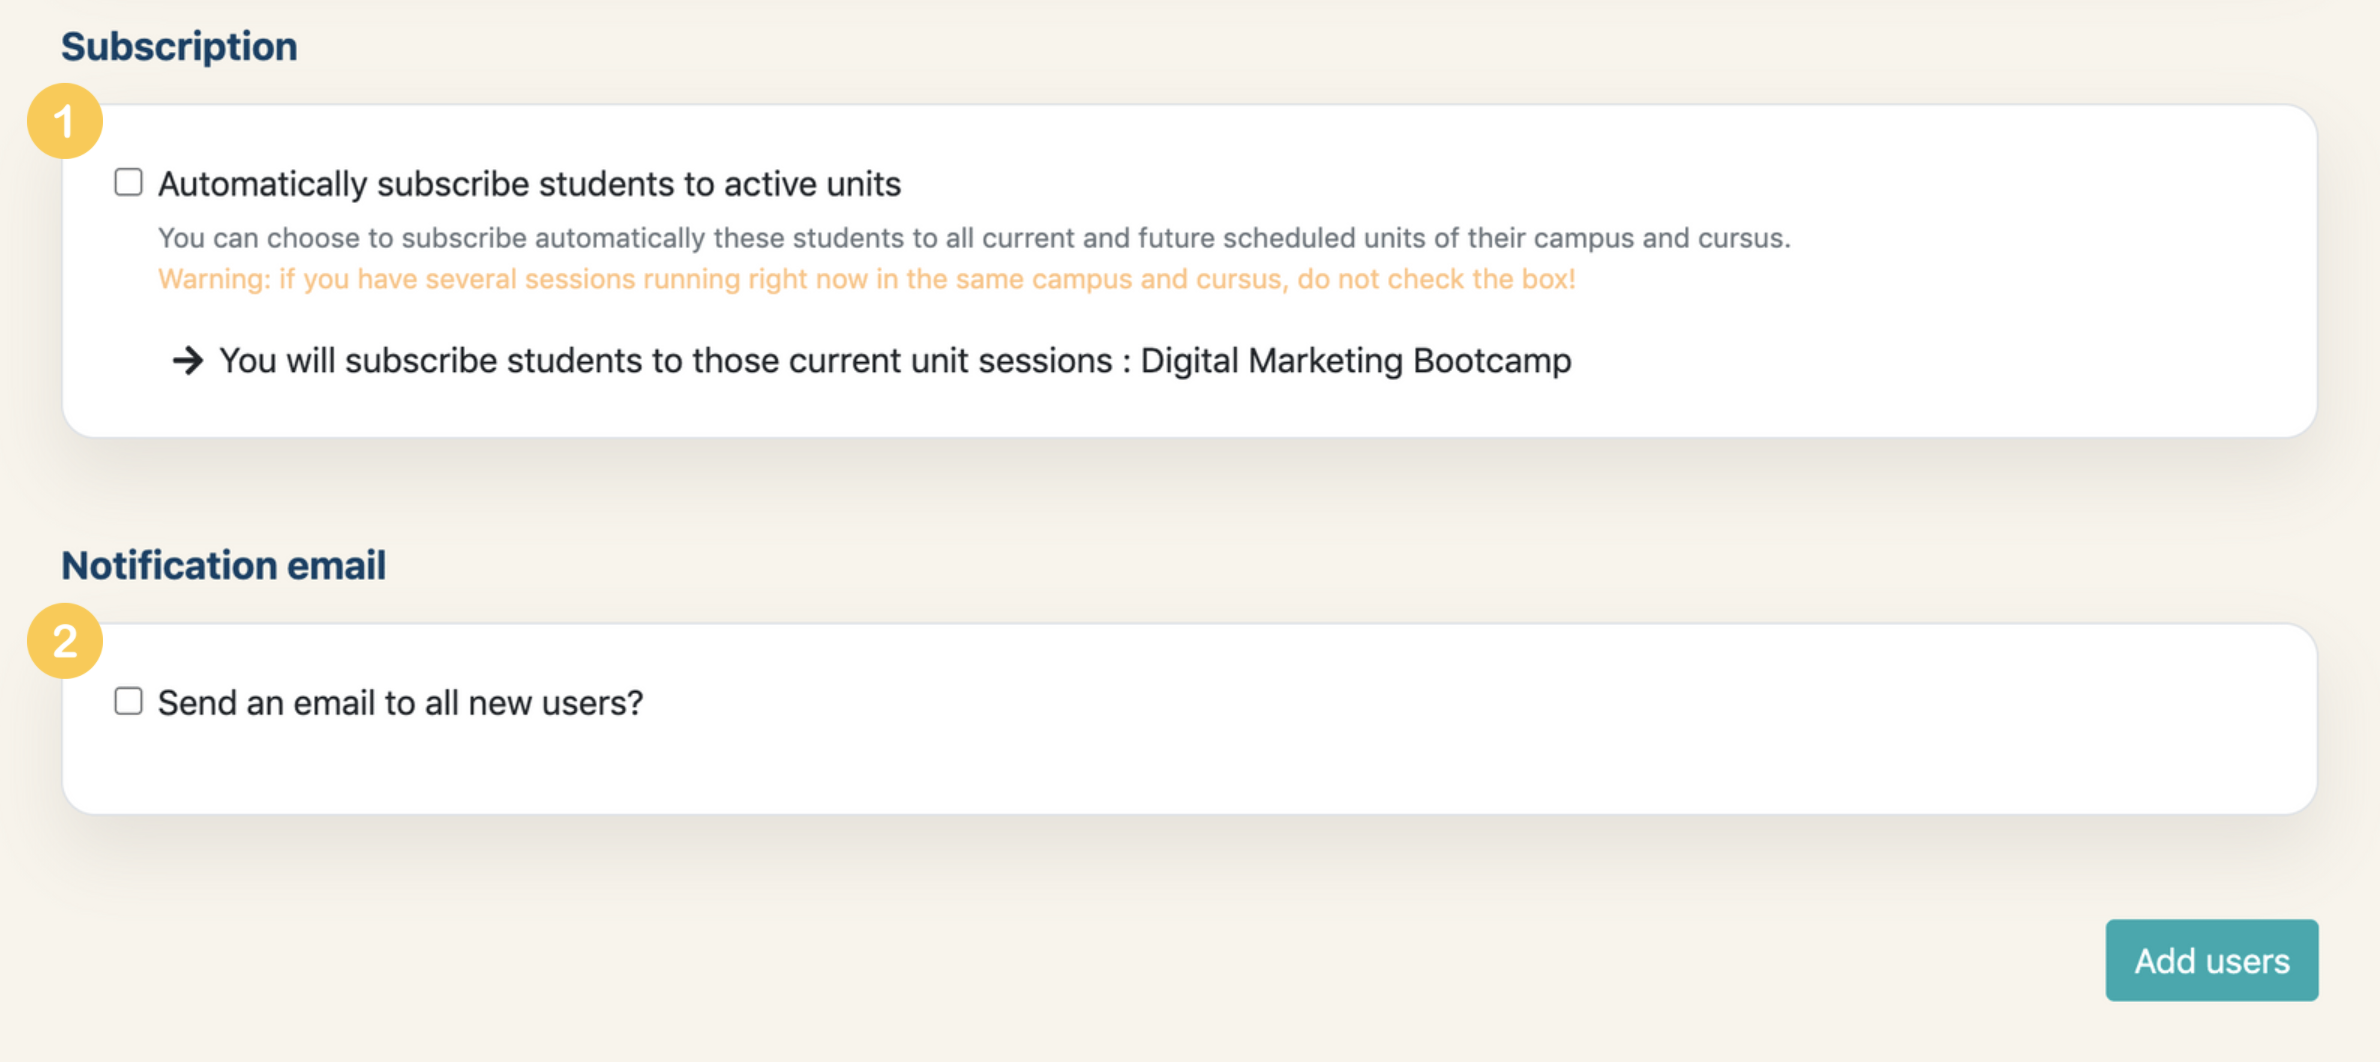
- If you have already configured a new session for the cursus, checking this box will automatically subscribe the new students to the upcoming unit sessions. (You should not check the box if you run the same cursus twice at the same time!)
- You can automatically send an on-boarding email to all new students. If you check the box, a panel opens to let you decide what goes into the email and when it's sent.
Click on Add users to complete the creation of all user accounts.
An email is then sent to the cursus' mentors, with a summary of all newly created accounts.